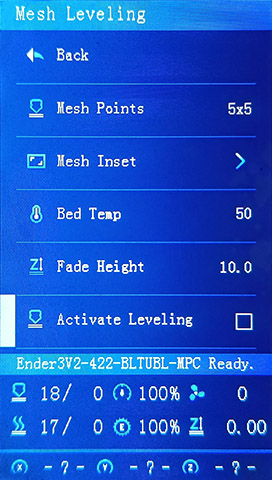
Mesh Leveling Menu
The leveling system is automatically disabled after any home axis operation to prevent interference with other features like bed tramming.
Important: to enable the leveling system, a valid mesh must be loaded into memory. Verify if you have a valid mesh in memory by opening the mesh viewer. Memory is volatile, EEPROM is permanent until it is erased or changed. Printer always uses mesh in memory.
The Activate leveling menu item, if present (it is disabled by default), is only a tool, it is like typing M420 S1 for activate and M420 S0 to deactivate mesh leveling in a terminal.
Note: Mesh leveling is deactivated by homing, that's why it is important to write
M420 S1(orG29 Afor UBL) after G28, or any operation that may perform a homing (like G29 J), in the start G-code script of your slicer.
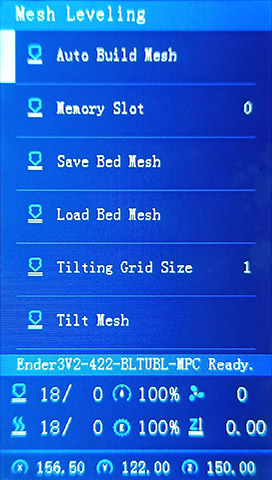
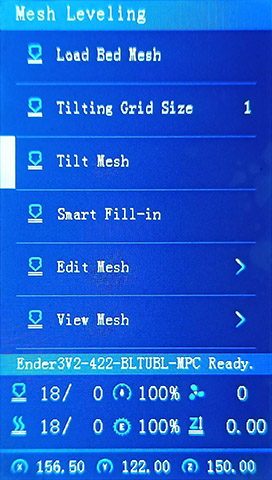
In UBL G29 P1 creates a mesh and stores it in memory. G29 S0 saves the current mesh in memory to slot 0 in EEPROM, G29 L0 loads a mesh from EEPROM slot 0 into memory. When you select Auto build Mesh in menu, a leveling mesh is created in memory and it is ready for be used, the printer will ask you to save the mesh into the current selected slot in the EEPROM.
If a valid mesh was previously saved in slot 0 in EEPROM, it is loaded into memory at power on. After updating the firmware, load your previously UBL mesh, and save again in mesh slot, then save EEPROM configuration, if you do not save the slot the printer will not know what slot autoload after rebooting. You can activate the leveling system and use that mesh by using G29 A or M420 S1.
When a valid mesh leveling is loaded and activated, you will see the z-offset icon change as in this video:
Blink-Leveling-Active.mp4
Get the latest firmware ![]()
Use the Firmware Selector
-
Generate a G-code image preview
- Slicer post processing scripts -
Update LCD Display ICON's
- How to install the DWIN_SET - How to install the firmware
- https://teachingtechyt.github.io/calibration.html - Great for all around calibrations
- https://ellis3dp.com/Print-Tuning-Guide/ - Secondary guide for extra references
- https://youtu.be/xzQjtWhg9VE - Video guide for E-steps and Flow calibration
Some the pages and images in this Wiki were copied from https://github.com/mriscoc/Ender3V2S1/wiki